
Getting theater-level sound at home isn’t about expensive gear, it’s about putting that gear in the right spot. A $500 speaker system placed correctly will outperform a $2,000 system crammed into corners or shoved against walls. Speaker placement affects everything: dialogue clarity, bass response, surround effects, and whether your neighbors hear more of the movie than you do. This guide walks through the physics and the practicalities, from measuring angles to dealing with real-world rooms that don’t match the diagrams. Whether setting up a 5.1, 7.1, or Atmos system, the principles stay the same.
Key Takeaways
- Proper home theater speaker placement improves sound quality more than expensive gear—a $500 system placed correctly outperforms a $2,000 system in poor positions.
- Front speakers should sit at 22–30 degrees from the center listening position with tweeters at ear level (36–42 inches high) to ensure clear dialogue and balanced sound.
- The subwoofer crawl method finds optimal bass placement by temporarily moving the sub to your listening position, playing test tones, and crawling around the room to identify the smoothest bass response.
- Surrounds should sit 2–3 feet above seated ear level at 90–110 degree angles (for 5.1 systems) to create immersion without localizing sound to specific speakers.
- Run your receiver’s calibration tool after physically positioning speakers, as it measures distances, sets levels, and applies EQ to correct for room acoustics—a critical step most users skip.
Understanding the Basics of Speaker Positioning
Home theater speaker systems follow standardized configurations: 5.1 (five speakers, one subwoofer), 7.1, or newer Atmos setups with height channels. The numbers matter, but geometry matters more.
The listening position, usually the center seat of a couch, serves as the reference point. All measurements and angles radiate from there. Professional installers call this the main listening position (MLP). In rooms with multiple seats, optimize for the center and accept slight compromises at the edges.
Speaker height should place tweeters (the small drivers handling high frequencies) at ear level when seated, typically 36–42 inches off the floor. This ensures sound waves reach ears directly rather than bouncing off furniture first. Wall-mounting brackets with tilt adjustment help dial this in.
Distance matters as much as angle. Time alignment, the principle that sound from all speakers should reach the MLP simultaneously, determines placement depth. Most AV receivers include calibration tools that measure distances and apply digital delays to sync everything up. Run that calibration after physically positioning speakers, not before.
Room size limits options. In spaces under 12×14 feet, a full 7.1 system crowds the room and creates muddled sound. Stick with 5.1. In larger dedicated theater rooms over 15×20 feet, adding rear surrounds and height channels pays off.
One critical distinction: bookshelf speakers need stands or wall mounts to hit proper height, while tower speakers sit on the floor but should still aim tweeters at ear level. Don’t assume bigger is better, a well-placed bookshelf speaker beats a poorly positioned tower.
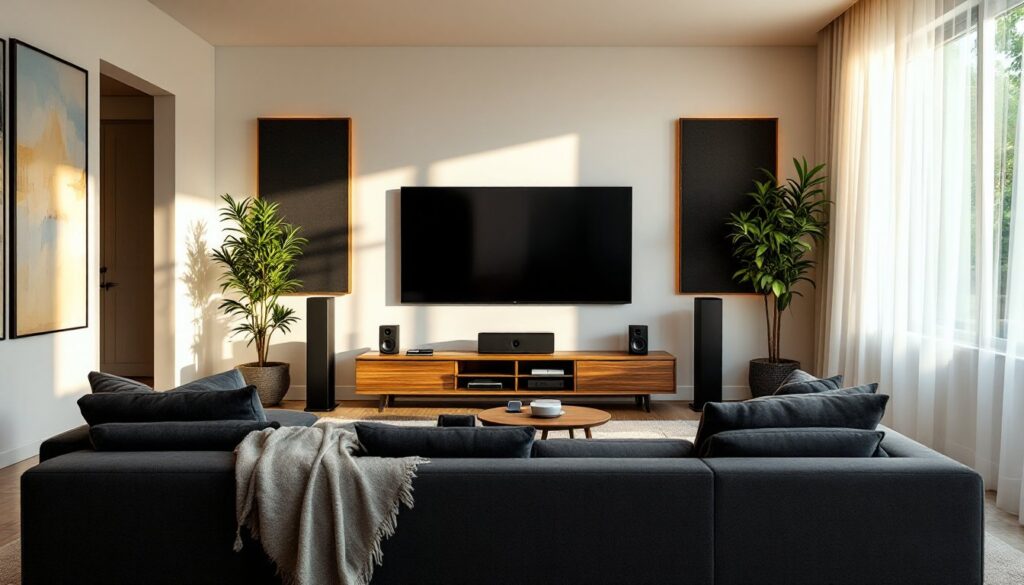
Front Speaker Placement for Optimal Sound
The front soundstage, left, center, and right speakers, carries 80% of a film’s audio. Dialogue, primary sound effects, and most music live here. Get this wrong and no amount of surround tuning fixes it.
Left and right speakers should sit at 22–30 degrees from the center viewing position, forming an equilateral triangle with the MLP. Measure the angle using a protractor app or simple geometry: if the MLP is 10 feet from the screen, speakers should be 7–8 feet apart from each other.
Pull speakers at least 2 feet away from side walls to minimize reflections that cause comb filtering, a phase issue that makes sound seem hollow. If wall placement is unavoidable, angle speakers slightly inward (toeing in) toward the MLP. This focuses sound forward and reduces sidewall bounce.
Match all three front speakers if possible. Mismatched brands or models create tonal shifts as sound pans across the screen, voices change timbre mid-sentence as characters move. If budget requires mixing, at least match the center channel to the left/right pair.
Avoid placing speakers inside entertainment centers or cabinets. Even partial enclosure creates boundary reinforcement that boosts bass unevenly and traps higher frequencies. If cabinetry is required, leave at least 6 inches of clearance on all sides and use acoustically transparent fabric doors, not solid wood.
Many setups involve home renovation planning to run in-wall wiring or mount equipment properly without surface conduits cluttering the space.
Center Channel Positioning
The center channel handles roughly 60% of movie dialogue and on-screen action. It must sit directly below or above the screen, aimed at the MLP.
Directly below the TV is ideal, within 2 feet vertically from the screen’s bottom edge. This keeps voices locked to actors’ mouths. Placing it too low (on a console 3+ feet below a wall-mounted TV) causes dialogue to seem detached from the image.
If mounting above the screen, angle it downward at the seating area. Gravity pulls sound down, so an upward-firing center creates a disconnected soundstage.
Horizontal vs. vertical orientation: Most center channels use horizontal designs with dual woofers flanking a tweeter. Don’t rotate these vertically, it disrupts the horizontal dispersion pattern they’re engineered for, narrowing the sweet spot to a single seat.
Clearance matters. The center channel should sit flush with the screen’s plane or slightly forward, never recessed behind the TV stand’s edge. Recessing it creates diffraction as sound bounces off the stand.
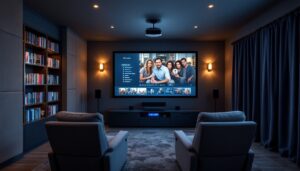
Surround Speaker Setup and Angles
Surround speakers create immersion, rain from all directions, helicopters overhead, ambient crowd noise. They shouldn’t draw attention: they should disappear into the environment.
For 5.1 systems, side surrounds sit at 90–110 degrees from the MLP. Picture a clock: if the center channel is 12 o’clock, surrounds sit between 3 and 4 o’clock (right) and 8 and 9 o’clock (left). Mount them 2–3 feet above seated ear level, higher than fronts, so sound doesn’t localize to specific speakers.
Wall-mounting works best. If stands are necessary, place them slightly behind the seating row, not directly beside heads. Sound from a speaker 18 inches from an ear overwhelms everything else.
7.1 configurations add rear surrounds at 135–150 degrees, nearly behind the MLP but not quite. This creates a fuller surround field. The side surrounds in 7.1 should move slightly forward, to 90 degrees, while rears handle the deep surround effects.
Dipole vs. monopole surrounds: Dipole speakers fire sound in two directions (front and back) to diffuse the soundfield. They work well for side surrounds in smaller rooms where speakers sit close to listeners. Monopole (standard) speakers work better for rear surrounds and larger spaces. Many modern systems use monopoles throughout for proper speaker setup that matches Atmos and object-based audio formats.
Atmos height speakers add overhead sound. For ceiling-mounted speakers, place them slightly ahead of and behind the MLP, not directly overhead. Upward-firing Atmos modules (which sit atop front or surround speakers and bounce sound off the ceiling) require flat ceilings between 8–12 feet high and work poorly with vaulted or textured ceilings.
Distance matching helps. If front speakers sit 10 feet from the MLP, try to keep surrounds within a similar range, 8 to 12 feet. Extreme distance mismatches (fronts at 8 feet, surrounds at 15 feet) make calibration harder and create arrival-time gaps that blur effects.
Subwoofer Placement for Deep, Even Bass
Bass frequencies below 80 Hz are omnidirectional, ears can’t pinpoint where they originate. That gives flexibility, but room acoustics complicate everything. Bass waves are long (a 40 Hz wave spans 28 feet), so they interact heavily with walls, creating peaks (boomy spots) and nulls (dead zones).
The subwoofer crawl finds optimal placement. Set the subwoofer temporarily at the MLP, play bass-heavy test tones, and crawl around the room’s perimeter listening for the spot with the smoothest, deepest bass. Place the subwoofer there. It sounds absurd, but it works.
Corner placement maximizes output due to boundary reinforcement from two walls and the floor, bass increases roughly 9 dB. It’s loud but often boomy and uneven. Use corner placement in large rooms where output matters more than precision.
Midwall placement (centered on a wall, 1–2 feet from the wall) offers smoother response. This works well in smaller rooms where corners cause too much boom.
Multiple subwoofers solve uneven bass better than any single sub placement. Two subs in opposing corners (front-left and rear-right) or midpoints on opposite walls cancel out room modes, the standing waves that cause boominess. It’s not about more bass: it’s about more even bass across all seats. Proper home theater placement strategies recommend dual subs for rooms over 250 square feet.
Avoid placing subs inside cabinets, behind furniture, or directly against walls. Leave at least 6–12 inches of clearance from walls if possible, and never block the subwoofer’s port (the opening that vents air). Blocked ports cause distortion and reduce output.
Phase adjustment (a control on the sub’s back panel or in the receiver) aligns the subwoofer’s output with the main speakers. If bass sounds thin, flip the phase from 0° to 180° and vice versa. One setting will sound noticeably fuller.
Run the receiver’s calibration after placing the sub. Most systems set the crossover (the frequency where the sub takes over from main speakers) at 80 Hz. Smaller bookshelf speakers may need 100–120 Hz. Let the receiver measure and decide.
Room Acoustics and Common Placement Mistakes
Hard surfaces, drywall, hardwood, glass, reflect sound, creating echoes and muddying dialogue. Soft surfaces absorb it. Rooms heavy on one or the other need balancing.
Acoustic treatment isn’t about soundproofing (blocking noise from escaping). It’s about controlling reflections within the room. First reflection points, the spots on sidewalls and ceiling where sound bounces before reaching ears, benefit most from treatment.
Find first reflection points by sitting at the MLP and having someone slide a mirror along the wall. When you see a speaker in the mirror, that’s a reflection point. Place a 2×4-foot acoustic panel (2-inch thick fiberglass or foam) there. Two panels per side wall and one on the ceiling between the MLP and front speakers make a measurable difference.
Rugs help in rooms with hardwood or tile. A thick area rug (at least ½-inch pile) between the front speakers and MLP reduces floor bounce. Heavy curtains on windows behind or beside speakers do the same for glass reflections.
Common mistakes:
• Pushing speakers flush to walls: Boundary reinforcement boosts bass unevenly and creates boomy, muddy sound. Pull fronts at least 1–2 feet out.
• Mounting surrounds at ear level: This makes listeners aware of the speakers rather than the soundfield. Go higher, 2–3 feet above ears.
• Mismatched speaker levels: Calibration tools set levels, but double-check by ear. If dialogue seems off-center, the center channel may be too quiet. Bump it up 1–2 dB.
• Ignoring the ceiling: Flat ceilings create strong reflections. In rooms with low ceilings (under 8 feet), consider ceiling treatment or Atmos modules won’t work well.
• Skipping calibration: Physical placement is half the job. Run the receiver’s auto-calibration (Audyssey, YPAO, Dirac, etc.) after positioning everything. It measures distances, sets levels, and applies EQ to compensate for room acoustics. Manual tweaks come after, not before.
• Using TV speakers alongside the system: Turn off the TV’s internal speakers. Mixing them with external speakers causes phase cancellation and comb filtering, dialogue gets hollow and effects lose impact.
Room shape matters. Square rooms are worst for bass, creating strong modes. Rectangular rooms with a length-to-width ratio around 1.6:1 distribute bass more evenly. If stuck with a square room, multiple subwoofers and bass traps (thick absorbers in corners) help.
Conclusion
Cinema-quality sound comes from discipline, not dollars. Measure angles, respect clearances, and let calibration tools do their job. Most problems trace back to skipping basics: speakers crammed in corners, surrounds at the wrong height, subwoofers shoved behind couches. Fix placement first, tweak settings second, and consider upgrades last. A well-placed budget system beats a flagship setup thrown together on instinct.