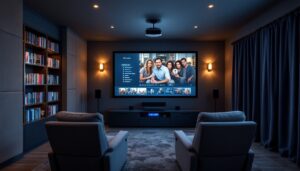

Upgrading your living room sound doesn’t have to mean hiring an installer or decoding dozens of component specs. A home theater in a box (HTIB) system bundles everything needed for immersive audio in one package: receiver, speakers, subwoofer, and cables. It’s designed for homeowners who want surround sound without the complexity of piecing together individual components. No advanced electrical knowledge required, just basic tool skills and a free afternoon. Whether you’re retrofitting a finished basement or boosting the audio in your family room, these all-in-one systems deliver theater-quality sound without the contractor-level headaches.
Key Takeaways
- A home theater in a box bundles a receiver, speakers, subwoofer, and all cables into one complete package, eliminating compatibility guesswork and component selection complexity.
- HTIB systems cost $300–$1,200 compared to $1,500–$2,000+ for component setups, making them ideal for homeowners seeking affordability and faster installation without contractor involvement.
- Proper speaker placement—front speakers flanking the TV, surround speakers 2–3 feet above ear level, and center channel for clear dialogue—is crucial for immersive audio performance.
- Room calibration compensates for acoustic variables like carpet and furniture; auto-calibration or manual SPL metering ensures balanced sound and prevents poor performance despite premium specifications.
- Modern HTIB systems feature HDMI eARC, Wi-Fi connectivity, and built-in streaming compatibility, reducing the need for additional devices and simplifying integration with existing home entertainment setups.
What Is a Home Theater in a Box System?
A home theater in a box is a complete audio solution sold as a single package. Most systems include five to seven speakers (front left, center, front right, surround left, surround right, and sometimes rear surround speakers), a powered subwoofer for low-frequency bass, and an AV receiver that decodes surround sound formats and routes audio to each channel.
Unlike traditional component setups where buyers select each piece individually, HTIB systems are engineered to work together out of the box. The receiver’s amplifier is sized to match the speaker impedance (typically 6-8 ohms), and all cables, speaker wire, HDMI, and sometimes optical, are included. This eliminates compatibility guesswork.
Most modern systems support Dolby Digital or DTS surround formats, with higher-end models offering Dolby Atmos for overhead sound effects. Power output ranges from 300 watts (entry-level) to 1,000+ watts (premium models). For context, 500 watts is typically sufficient for rooms up to 250 square feet: larger spaces or open-concept layouts may require more power or additional speakers.
HTIB systems are cosmetic upgrades, they don’t involve structural work, permits, or licensed trades. Installation is purely furniture-level placement and cable management.
Key Benefits of Choosing an All-in-One Solution
Simplified purchasing. Instead of researching receiver specs, speaker sensitivity ratings, and impedance matching, buyers get a curated package. This cuts decision fatigue and reduces the risk of mismatched components that underperform or, worse, cause amplifier clipping.
Lower total cost. Component systems can easily exceed $1,500-$2,000 when factoring in a quality receiver ($400-$700), five speakers ($300-$800), a subwoofer ($200-$500), and cabling ($50-$100). HTIB systems typically range from $300 to $1,200, depending on brand and feature set. While audiophiles may prefer separates, the value proposition for casual users is undeniable.
Faster setup. All wiring is color-coded and labeled. The receiver’s rear panel matches speaker outputs to cable ends, so there’s no need to trace polarity or consult wiring diagrams. Most setups take 1-2 hours, including speaker placement and initial calibration.
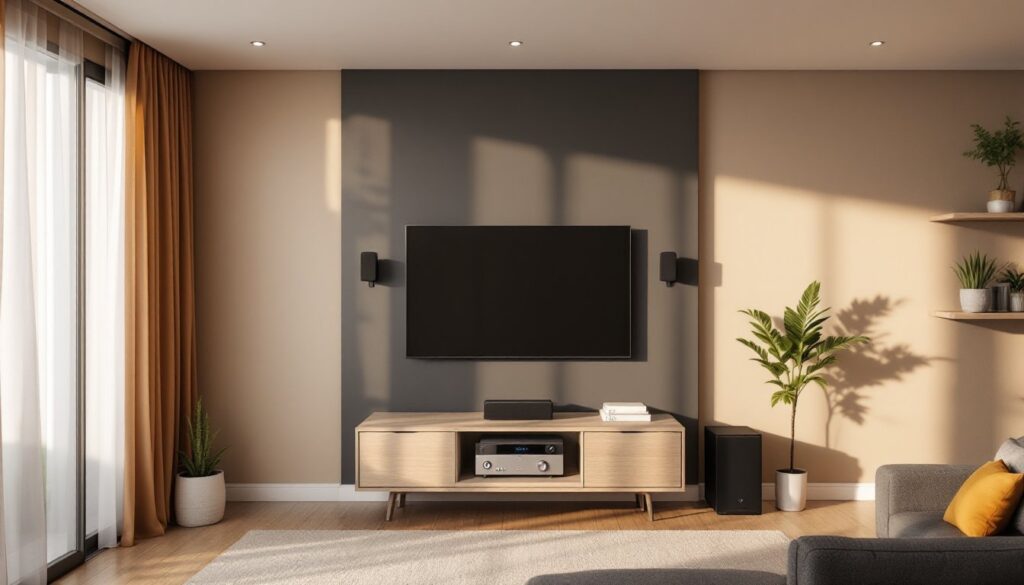
Space efficiency. HTIB speakers are compact, often satellite designs measuring 3-5 inches tall. They’re easier to mount on walls or tuck onto shelves compared to traditional bookshelf speakers. The subwoofer is typically the only large component, and it can go anywhere in the room (low frequencies are omnidirectional).
Streamlined upgrades. Many 2026 models include built-in streaming (Spotify Connect, AirPlay 2), eliminating the need for separate devices. Some also feature HDMI eARC (enhanced audio return channel), which pulls audio directly from a TV’s internal apps without additional cables.
What to Look for When Shopping for Your System
Not all HTIB systems are created equal. Here’s what separates reliable performers from budget disappointments.
Audio Quality and Speaker Configuration
Speaker count matters, but so does design. A 5.1 system (five speakers, one subwoofer) is standard and sufficient for most rooms. A 7.1 system adds rear surround speakers for larger spaces or open floor plans. Some premium models offer 5.1.2 or 7.1.2 configurations, where the “.2” indicates upward-firing speakers for Dolby Atmos height effects.
Pay attention to speaker material and driver size. Tweeters (high-frequency drivers) should be at least 0.75 inches: woofers (mid-range) should be 2.5-3 inches for satellite speakers. Subwoofers need at least an 8-inch driver for meaningful bass response, 10-12 inches is better for home theater use.
Frequency response is listed in the specs as a range (e.g., 40 Hz – 20 kHz). The lower the first number, the deeper the bass. Anything below 50 Hz is acceptable: below 40 Hz is excellent. According to testing for sound quality and performance, well-designed systems prioritize balanced frequency response over raw wattage.
Avoid systems with passive subwoofers (rare but still sold in ultra-budget models). Powered subwoofers have built-in amplifiers and deliver far better low-end punch.
Connectivity and Smart Features
HDMI inputs are non-negotiable. The receiver should have at least three HDMI 2.1 inputs to support 4K/120Hz passthrough for gaming consoles and modern streaming devices. HDMI ARC or eARC on the output allows the TV to send audio back to the receiver, which is critical if you’re using the TV’s built-in apps.
Wireless options add flexibility. Bluetooth 5.0 or higher enables streaming from phones and tablets. Wi-Fi connectivity supports multi-room audio systems and firmware updates. Some 2026 models integrate with voice assistants (Alexa, Google Assistant) for hands-free control.
Check for optical (TOSLINK) and coaxial digital inputs as backups. Older TVs and some soundbars use these connections. Analog RCA inputs are helpful if you’re connecting a turntable or legacy equipment.
Auto-calibration is a premium feature worth paying for. Systems with a calibration microphone analyze room acoustics and adjust speaker levels, crossover frequencies, and delay settings automatically. This compensates for furniture, carpet, and wall reflections without needing a sound meter or manual tuning.
Setting Up Your Home Theater in a Box: A DIY-Friendly Process
Most homeowners can install an HTIB system with basic hand tools and no prior AV experience. Here’s the process.
1. Plan speaker placement. Front left and right speakers go on either side of the TV, angled slightly inward. The center channel sits directly above or below the screen (it handles dialogue, so clear line-of-sight to seating is critical). Surround speakers go to the sides or slightly behind the main seating area, mounted 2-3 feet above ear level. The subwoofer can go anywhere, but corner placement often reinforces bass.
2. Run speaker wire. Use 16-gauge speaker wire for runs under 50 feet: upgrade to 14-gauge for longer distances. If routing behind drywall, check local codes, some jurisdictions require CL2 or CL3-rated (fire-resistant) cable for in-wall use. Use a stud finder to avoid drilling into joists or electrical lines. Fish tape helps pull wire through walls.
For surface runs, use cable raceways or cord covers to keep wires tidy and prevent tripping hazards. Staple wire to baseboards if it’s hidden behind furniture, but avoid crushing the insulation.
3. Connect speakers to the receiver. Match color-coded terminals: red to red (positive), black to black (negative). Polarity matters, reversed connections cause phase issues and weak bass. Twist bare wire ends tightly or use banana plugs for a cleaner connection.
4. Hook up video sources. Run HDMI cables from devices (Blu-ray player, game console, streaming box) to the receiver’s HDMI inputs. Connect the receiver’s HDMI output to the TV. Keep cables under 15 feet unless using active (powered) HDMI cables, signal degradation is rare but possible on longer passive runs.
5. Power on and calibrate. Plug the receiver into a surge protector (not a power strip, receivers draw significant current). Run the auto-calibration routine if included. If manual setup is required, set the crossover frequency to 80 Hz (the point where the subwoofer takes over from the main speakers) and adjust individual speaker levels so dialogue sounds clear at normal listening volume.
Tools needed: Wire strippers, drill with paddle or spade bits (if wall-mounting), stud finder, level, fish tape (for in-wall runs), and a tape measure. Wear safety goggles when drilling overhead.
No permits are required, this is furniture-level installation, not electrical or structural work. But, if you’re opening walls or running cable through fire-rated assemblies, consult local building codes. Some jurisdictions require CL-rated cable for in-wall use.
Common Mistakes to Avoid During Installation
Skipping the calibration step. Even if the system sounds “good enough” out of the box, room acoustics vary wildly. Hard floors reflect sound differently than carpet: drywall absorbs less than fabric furniture. Calibration compensates for these variables. If the system lacks auto-calibration, download a free SPL (sound pressure level) meter app and manually balance speaker levels to within 1-2 dB of each other.
Placing the subwoofer in the center of the room. While bass is omnidirectional, placement still affects output. The “subwoofer crawl” technique works: place the sub in the main seating position, play bass-heavy content, and crawl around the room’s perimeter. Where the bass sounds fullest, place the sub. Corner placement amplifies output but can also cause boominess, experiment.
Ignoring wire gauge for long runs. 18-gauge wire is common in budget HTIB kits, but it’s only suitable for runs under 25 feet. Longer distances cause resistance, reducing power delivery and muddying sound. Upgrade to 16-gauge or thicker if needed. It’s a $15-$25 fix that prevents frustration later.
Mounting speakers without anchors. Drywall alone won’t hold a speaker. Use toggle bolts or molly bolts rated for at least twice the speaker’s weight. If mounting into a stud (preferred), use 2-inch wood screws. Check behind the wall for plumbing or wiring before drilling, a stud finder with wire detection is worth the investment.
Overdriving the system. HTIB receivers aren’t designed for concert-level volume in large, open spaces. Pushing an underpowered receiver causes clipping (distortion) and can damage speakers. If sound quality degrades at high volume, that’s the ceiling. For larger rooms (over 300 square feet), consider a more powerful system or supplemental speakers.
Neglecting firmware updates. Many 2026 models receive updates that improve codec support, fix bugs, or add streaming services. If the receiver has Wi-Fi, enable automatic updates. Otherwise, check the manufacturer’s website quarterly and update via USB if needed.
Finally, don’t assume all home theater systems are equal, research matters. Reviews comparing top-rated options can highlight durability, real-world performance, and long-term support before you buy. A little assignments up front prevents buyer’s remorse and ensures the system matches your space and usage.