
Building a dedicated home theater space has come back into focus as physical media collectors and TV series enthusiasts rediscover the quality and reliability of DVDs. Online home theater forums remain active hubs where DIYers share setups, troubleshoot equipment, and discuss their favorite TV shows on DVD. Unlike streaming services that rotate content in and out, a well-curated DVD collection gives viewers permanent access to complete series, director’s cuts, and bonus features. This guide walks through the practical steps for setting up a home theater optimized for DVD playback, from equipment selection to acoustic treatments.
Key Takeaways
- A home theater forum is an essential resource for DVD enthusiasts seeking equipment recommendations, upscaling technology comparisons, and real-world setup advice beyond manufacturer specifications.
- TV series on DVD offer permanent access to complete collections, unedited versions, special features, and bonus content that streaming services frequently omit or rotate out.
- Essential DVD home theater equipment includes a quality upscaling DVD player, an appropriate display (projector or large-format TV), certified HDMI cabling, and dedicated power infrastructure on a 15-amp circuit.
- Optimal viewing distance for DVD content is 8-12 feet from a 100-inch screen, with proper light control, acoustic treatment, and neutral wall colors critical for picture quality and comfort.
- DIY home theater builders can save 60-70% on costs by constructing equipment racks, making acoustic panels, painting screens, and sourcing used seating through secondhand marketplaces.
What Is a Home Theater Forum and Why TV on DVD Matters
A home theater forum is an online community where enthusiasts share builds, equipment recommendations, and troubleshooting advice for dedicated viewing spaces. Popular platforms like AVS Forum and Home Theater Forum have sections dedicated to physical media playback, including DVD and Blu-ray setups. These communities offer real-world comparisons of upscaling technology, player reliability, and display calibration techniques that go beyond manufacturer specs.
TV series on DVD remain relevant for several practical reasons. Physical media doesn’t require internet bandwidth or suffer from compression artifacts common in streaming. Many classic series are unavailable on streaming platforms or appear in edited versions. DVDs include special features, commentary tracks, and unaired pilots that streaming services typically omit. For serious collectors, ownership means content can’t disappear when licensing agreements expire.
From a home improvement perspective, dedicating space to a DVD-based home theater involves wiring considerations, shelving for media storage, and room treatments that differ from casual streaming setups. Forums provide region-specific advice on running conduit for HDMI cables, building media consoles, and optimizing sightlines in multipurpose rooms.
Essential Equipment for Playing DVDs in Your Home Theater Setup
A dedicated home theater for DVD playback requires four core components: a DVD player (or universal player), a display screen, appropriate cabling, and power management. Each element affects picture quality, ease of use, and long-term reliability.
Start with power infrastructure. A 15-amp dedicated circuit is the minimum for home theater equipment. If adding new circuits, this requires a permit in most jurisdictions and should follow NEC Article 210 requirements for branch circuits. Use a power conditioner or surge protector rated for at least 1,800 watts to protect sensitive electronics. Install outlets at equipment height (18-24 inches above finished floor) to avoid visible cords running up walls.
For cabling, use certified High Speed HDMI cables even for standard-definition DVD players. Cable runs longer than 15 feet may require active cables or signal boosters to prevent dropouts. If running cables through walls, use CL2-rated or CL3-rated cables that meet fire safety codes. Install conduit or wall plates behind the screen and equipment rack for clean routing and future upgrades.
Choosing the Right DVD Player and Display Screen
Most modern DVD players are upscaling models that convert 480p DVD content to 1080p or 4K for better display on high-resolution screens. Look for players with HDMI output, a progressive scan feature, and support for multiple disc formats (DVD-R, DVD+R, DVD-RW). Oppo and Sony models frequently appear in forum recommendations for build quality and upscaling performance, though budget players from Panasonic and LG handle standard playback reliably.
Universal players that support DVD, Blu-ray, and 4K discs cost more upfront but consolidate equipment and future-proof the setup. Avoid cheap combo units that include VHS decks, they’re often unreliable and take up valuable rack space.
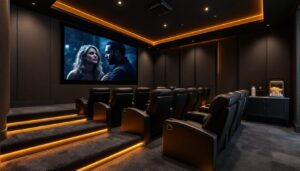
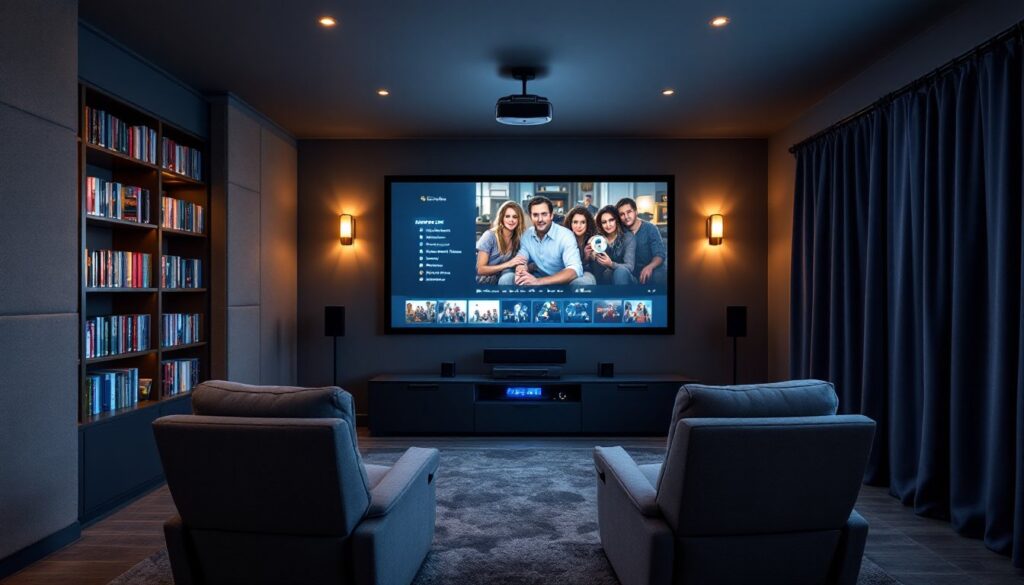
For displays, projectors offer the most cinematic experience in dedicated theater rooms, while large-format TVs (75 inches and up) work better in multipurpose spaces with ambient light. Projector installations require ceiling mounting with appropriate blocking between joists (use 2×6 or 2×8 blocking screwed into at least two joists). Calculate throw distance carefully: most 1080p projectors need 10-15 feet from screen to lens for a 100-inch image.
If choosing a TV, wall-mounting requires locating studs (16 inches on center in most residential framing) and using a mount rated for at least 1.5 times the TV’s weight. For drywall installations where studs don’t align, install a horizontal mounting board (3/4-inch plywood, minimum 12 inches tall, secured to multiple studs) behind the drywall before hanging.
Optimizing Your Space for the Best TV on DVD Viewing Experience
Room dimensions and seating placement directly affect viewing comfort. For a 100-inch diagonal screen, optimal viewing distance is 8-12 feet for DVD content. Seat viewers at eye level with the center of the screen when seated, typically 42 inches off the floor for a wall-mounted display.
Light control is critical for picture quality. Install blackout curtains or cellular shades on windows. Can lights and recessed fixtures create glare on screens: replace them with dimmable sconces or LED strip lighting behind seating. Use a separate dimmer circuit (requires a neutral wire at the switch box) to adjust ambient light during viewing.
Paint walls in matte neutral tones, medium gray or taupe work better than bright white, which reflects screen light and reduces perceived contrast. Avoid glossy or semi-gloss finishes. If budget allows, paint the wall behind the screen a darker color to improve the sense of depth.
Carpeting or area rugs reduce sound reflections off hard flooring. For dedicated theaters in basements, install carpet over carpet pad (6-8 pound density) for better acoustics and comfort. In multipurpose rooms, a large rug (at least 8×10 feet) under the seating area helps.
Sound System Configuration and Room Acoustics
DVD audio typically outputs in Dolby Digital 5.1 or DTS, requiring a minimum 5.1-channel setup: left/center/right front speakers, two surround speakers, and a subwoofer. An AV receiver with at least 5.1 channels and 75 watts per channel handles most rooms under 250 square feet.
Speaker placement follows specific guidelines. Center channel mounts directly above or below the screen, angled toward the primary seating position. Front left and right speakers angle inward at 22-30 degrees from the center seat. Surround speakers mount 2-3 feet above ear level, 90-110 degrees from center. The subwoofer placement is flexible, try corner placement first for more bass output, or mid-wall for smoother response.
Run 16-gauge speaker wire (minimum) for runs under 50 feet. Use 14-gauge for longer runs or higher-power systems. Label both ends of every wire and leave 10-15% slack for future adjustments.
Room acoustics matter more than expensive speakers. Bare drywall and large windows create echoes and muddy dialog. Add acoustic panels (2-inch thick, fiberglass or rockwool core) at first reflection points, the wall spots where sound from the front speakers bounces toward seating. Use a mirror at seated ear height to locate these spots: if seated listeners can see a speaker in the mirror, that’s a reflection point.
Bass traps in room corners control low-frequency buildup that makes some notes boom while others disappear. DIY bass traps use rigid fiberglass insulation (Owens Corning 703 or equivalent) wrapped in acoustically transparent fabric. Commercial panels from GIK Acoustics or ATS Acoustics cost $50-150 each: DIY versions run $20-40 in materials.
For spaces where enthusiasts gather ideas, like those found on home design platforms, acoustic treatments are increasingly shown as design elements, not eyesores. Fabric-wrapped panels come in custom colors and prints.
Popular TV Series on DVD Worth Adding to Your Collection
Certain TV series showcase the advantages of DVD over streaming. The Wire complete series includes extensive commentary tracks from creator David Simon and cast members. Arrested Development seasons 1-3 feature enhanced viewing modes with pop-up annotations not available on streaming. Firefly includes three commentary tracks per episode and a feature-length documentary on the failed network run.
British series often appear in superior versions on Region 2 DVDs (UK format). The Office (UK) complete set includes the original Christmas special in its unedited form. Playing Region 2 discs requires a region-free DVD player or a standard player modified with firmware hacks (voids warranty, but widely documented in forums).
Classic series with practical home improvement tie-ins include This Old House season collections and The Woodwright’s Shop. These workshop-based shows provide techniques that forums still reference, and the DVD versions include printable project plans in the disc extras.
When purchasing used DVDs, inspect discs for scratches radiating from center to edge (these cause skipping). Surface scratches parallel to the disc edge usually don’t affect playback. Store discs vertically in cases, stacking discs horizontally can warp them over time. For collectors with hundreds of discs, dedicated media storage furniture with adjustable shelves (spaced 7-8 inches apart for standard DVD cases) keeps libraries organized and accessible.
Budget-Friendly DIY Tips for Enhancing Your Home Theater
Professional home theater installations cost $5,000-25,000, but DIYers can build capable systems for $1,200-3,000 by handling labor and using strategic upgrades.
Build your own equipment rack using 3/4-inch plywood and 2×2 lumber. Standard rack equipment is 19 inches wide: build internal dimensions of 20 inches wide to allow clearance. Space shelves 6-8 inches apart for AV receivers and players. Add 2-inch diameter grommets in the back panel for cable routing. Finish with semi-gloss black paint for a clean look. Material cost: $40-70.
DIY acoustic panels save 60-70% over commercial options. Cut 2-inch Owens Corning 703 fiberglass to 24×48-inch panels (wear a respirator, gloves, and long sleeves, fiberglass irritates skin and lungs). Build simple frames from 1×4 pine, wrap panels in acoustically transparent fabric (burlap or guilford-of-maine FR701), and hang using Z-clips. Cost per 2’×4′ panel: $25-35 in materials.
Paint upgrade: Use a screen paint formulation (Digital Image Screen Goo or equivalent) on a smooth wall instead of buying a fixed-frame screen. Prep the wall with joint compound to fill texture, sand smooth with 220-grit sandpaper, prime with gray primer, then apply screen paint per manufacturer instructions (usually 2-3 coats). A 110-inch diagonal painted screen costs $150-200 in materials versus $400-800 for a commercial fixed frame.
Conceal cables without opening walls by running them through adhesive cord channels (Wiremold or equivalent) painted to match wall color. For a cleaner look, run cables behind baseboards, carefully pry baseboards off with a flat pry bar, route cables, and reinstall with finish nails. This works in rooms where baseboards aren’t glued.
Seating: Used home theater recliners appear regularly on Craigslist and Facebook Marketplace for $200-500 per seat (new ones cost $800-2,000). Inspect mechanisms carefully, broken recliners aren’t worth hauling. For a completely DIY approach, build a riser platform (2×10 joists, 3/4-inch plywood deck) for back-row seating. An 8-foot-wide × 3-foot-deep riser at 8-inch height costs $80-120 in lumber and creates stadium seating with standard furniture.
Many smart home technology resources cover integration of streaming devices, but for DVD-focused setups, investing in quality upscaling and robust physical media storage delivers better long-term value than chasing the latest connected features.
Lighting automation: Install smart dimmer switches (Lutron Caseta, Leviton Decora Smart) to control ambient lighting from a remote or phone. These require a neutral wire at the switch box, common in homes built after 1985 but rare in older construction. If no neutral is present, use smart bulbs in existing fixtures instead (no rewiring needed). Budget $40-80 per dimmer switch or $40-60 per set of smart bulbs.
For those researching home theater equipment guides, remember that the best system is one that’s fully installed and calibrated, not the one with unused features. Start with solid fundamentals, good speakers, proper placement, basic acoustic treatment, then expand as budget and interest allow.