
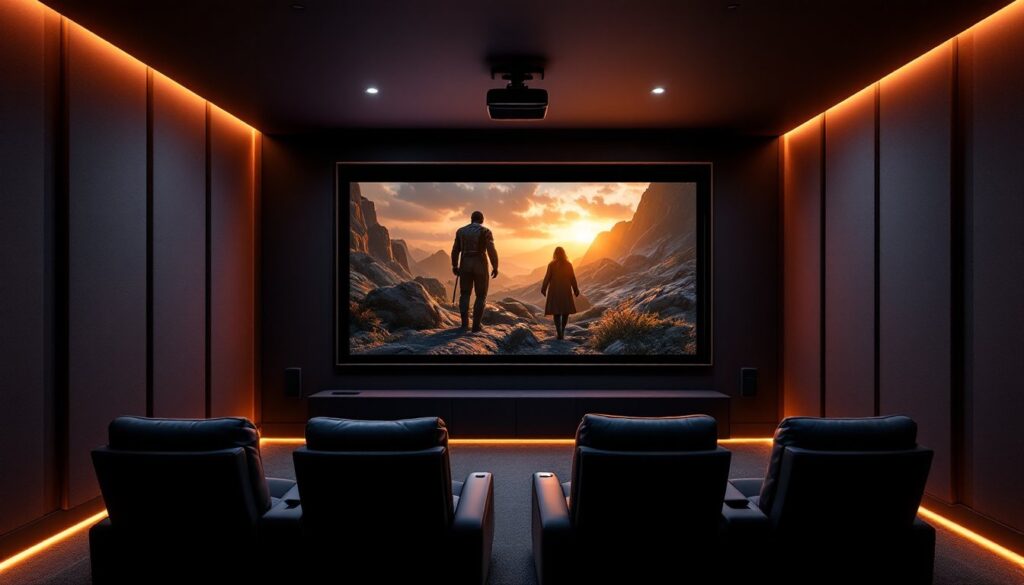

Building a home theater isn’t just about the projector, the screen is where the magic actually happens. A quality screen transforms movie nights, gaming sessions, and weekend sports into immersive experiences that rival commercial theaters. But walk into any home theater forum or product page, and you’ll quickly find yourself buried in specs: gain ratings, aspect ratios, tensioning systems, and material options that range from matte white to acoustic transparent. This guide cuts through the jargon and walks through what matters when selecting a home theater screen in 2026, from understanding why a dedicated screen beats a blank wall to matching the right type and features to a specific room and budget.
Key Takeaways
- Home theater screens use engineered materials with controlled reflectivity to deliver consistent brightness and image quality that far exceeds a painted wall or bed sheet.
- Fixed-frame screens offer the best image quality and widest material options for dedicated theaters, while motorized retractable screens provide versatility for multipurpose rooms and smart home integration.
- Screen gain (0.8–1.3) and viewing angle work together—use 1.0–1.1 gain for controlled rooms with narrow seating, and higher gain only when light control is impossible or projectors output under 2,000 lumens.
- Proper home theater screen sizing follows SMPTE recommendations of 30–40 degrees viewing angle, calculated as viewing distance divided by 1.5 to 2.0 for immersive or relaxed viewing.
- Acoustic transparent materials, black backing, and velvet edge treatments enhance image quality and soundstage, while gray screens and ALR options better manage ambient light in non-dedicated spaces.
- Maintenance requires only gentle dusting and occasional damp-cloth cleaning; motorized screens need annual inspections of the roller mechanism to prevent motor failure and material sagging.
What Are Home Theater Screens and Why They Matter
A home theater screen is a purpose-built surface designed to reflect projected light evenly across its surface, delivering consistent brightness, accurate color, and sharp image detail. Unlike a painted wall or bed sheet, dedicated screens use engineered materials with controlled reflectivity and texture to optimize image quality.
The gain of a screen, typically ranging from 0.8 to 1.3 for most residential setups, describes how much light it reflects compared to a reference material. A gain of 1.0 reflects light evenly in all directions (called a Lambertian surface). Higher gain screens reflect more light but narrow the viewing angle: lower gain screens work well in light-controlled rooms with powerful projectors.
Screen material also affects color accuracy. White and gray screens are most common. White screens maximize brightness and work with most projectors, while gray screens improve black levels and contrast in rooms with ambient light by absorbing some of that stray illumination.
Aspect ratio is another core consideration. Most modern content is filmed in 16:9 (standard HDTV) or 2.35:1/2.40:1 (ultra-wide cinematic). Choosing the wrong ratio means black bars or cropped images. Fixed-frame screens typically commit to one ratio, while some motorized models offer masking systems to adapt.
Why not just project onto a wall? Paint and drywall texture scatter light unevenly, creating hotspots and washing out detail. Even specialized screen paint can’t match the uniformity of a tensioned fabric screen. For serious picture quality, a dedicated screen is non-negotiable.
Types of Home Theater Screens: Finding Your Best Match
Fixed Frame Screens
Fixed frame screens mount permanently to the wall like a large picture frame. The screen material stretches over an aluminum or wood frame and stays tensioned with springs, snaps, or a retaining cord system. Tension keeps the surface flat and wrinkle-free, which is critical for sharp focus across the entire image.
Pros: Best image quality due to consistent tension, no moving parts to fail, sleek appearance, widest range of material options (including acoustically transparent fabrics that let sound pass through for hidden center-channel speakers).
Cons: Always visible, requires dedicated wall space, not ideal for multipurpose rooms.
Typical frame depth is 1–2 inches with a velvet-wrapped border to absorb light and enhance perceived contrast. Installation requires locating studs and mounting the frame securely, expect to spend 1–2 hours with a drill, level, and a helper for screens over 100 inches diagonal.
Fixed frames are the go-to choice for dedicated theater rooms where the screen stays up 24/7. They start around $200 for basic 100-inch models and climb past $1,000 for premium materials and larger sizes.
Motorized Retractable Screens
Motorized screens roll into a ceiling- or wall-mounted housing when not in use, controlled by remote, wall switch, or smart home integration. The screen material wraps around a roller tube with a quiet motor (usually 12V DC) that raises and lowers it.
Pros: Versatile for multipurpose spaces, clean look when retracted, protects screen material from dust and damage, available in ceiling-recessed models for completely hidden installation.
Cons: Higher cost (typically $500–$3,000+), potential for motor failure over time, slight waviness in the material compared to tensioned fixed frames, installation complexity increases with in-ceiling models.
Look for tensioning systems, side cables or rods that keep the material flat as it deploys. Untensioned motorized screens develop waves and sag, especially in larger sizes. Testing from Digital Trends often highlights the difference in picture uniformity between tensioned and non-tensioned models.
Motorized screens shine in living rooms, basements, or bonus rooms that serve multiple functions. Measure the ceiling height carefully, most housings are 4–6 inches in diameter and require clearance above the screen deployment area.
Portable and DIY Screen Options
Portable screens use a collapsible frame (usually aluminum or fiberglass poles) with a fabric screen that stretches over it, similar to a camping tent. They’re designed for outdoor movie nights, tailgating, or temporary setups.
Pros: Affordable ($100–$500), easy to set up and break down (10–15 minutes), no permanent installation, great for renters or seasonal use.
Cons: Less durable, wind is the enemy outdoors, material is rarely as flat as fixed or tensioned screens, limited size options (most max out around 120 inches).
DIY screens are another route. Popular methods include stretching spandex fabric over a wooden frame or applying multiple coats of screen paint (such as Screen Goo or Digital Image Pro) to a smooth wall. Spandex is forgiving and tensioning is straightforward, but cheap fabric can introduce color shifts. Screen paints offer flexibility in size and shape but require meticulous surface prep, any drywall imperfection telegraphs through.
DIY saves money but demands time and precision. A well-executed spandex screen on a homemade frame can rival commercial options at half the cost, but expect to invest a weekend and accept that results vary with skill level.
Key Features to Consider When Shopping for a Screen
Gain and viewing angle work together. High-gain screens (1.3–1.8) boost brightness in rooms with ambient light or when using a lower-lumen projector, but viewers sitting off-axis see a dimmer, color-shifted image. Stick with 1.0–1.1 gain for dedicated theaters with controlled lighting and seating in a narrow arc. Use higher gain only if light control is impossible or the projector outputs less than 2,000 lumens.
Acoustic transparency matters if planning to mount speakers behind the screen. AT (acoustically transparent) materials use micro-perforations or woven fabrics that allow sound to pass through with minimal loss. These screens work beautifully for center-channel speakers and create a seamless soundstage, but the perforations can be visible up close and may slightly reduce brightness. Reviews from Tom’s Guide frequently test AT screens to measure sound transmission loss and image impact.
Black backing prevents light bleed-through, essential if there’s a window, light fixture, or bright wall behind the screen. Most fixed-frame and quality motorized screens include this.
Edge treatments, usually black velvet borders, absorb stray light and enhance contrast. A 2–4 inch border around the active screen area visually frames the image and prevents reflections from bouncing back.
Material choice extends beyond gain. Matte white is the most versatile and color-neutral. Gray screens (also called high-contrast screens) improve black levels in brighter rooms by absorbing ambient light while still reflecting the projector’s light. Ambient light rejecting (ALR) screens use angular or layered surfaces to reject ceiling and side light while reflecting the projector’s light toward viewers, ideal for living rooms but often expensive ($800–$2,500) and finicky about projector placement.
Cleaning and maintenance is straightforward but necessary. Dust the screen gently with a microfiber cloth every few months. For smudges, use a damp cloth with mild soap, never ammonia-based cleaners, which degrade screen coatings. Retractable screens collect less dust, but inspect the roller mechanism annually and vacuum the housing opening.
Screen Size and Viewing Distance Calculator
Proper screen size depends on viewing distance and resolution. The Society of Motion Picture and Television Engineers (SMPTE) recommends a viewing angle of 30–40 degrees for an immersive experience, while THX suggests 36–40 degrees.
Use this quick formula: screen width (in inches) = viewing distance (in inches) ÷ 1.5 to 2.0. For example, if the couch sits 10 feet (120 inches) from the screen, divide 120 by 1.5 for an immersive setup (80-inch width, roughly 92-inch diagonal in 16:9) or by 2.0 for a more relaxed view (60-inch width, about 69-inch diagonal).
Resolution also plays a role. With 4K and increasingly available 8K projectors, viewers can sit closer without seeing pixels. For 1080p, stay at least 1.5× the screen width away: for 4K, 1.0× works comfortably.
Measure the wall space carefully, accounting for the screen frame, border, and any furniture. A 120-inch diagonal 16:9 screen measures roughly 104 inches wide by 59 inches tall, add the frame (typically 2–3 inches per side) for total dimensions. Use painter’s tape to outline the screen on the wall before purchasing to visualize scale.
Ceiling height can limit size, especially with drop-down motorized screens. Leave at least 12 inches between the screen’s bottom edge and any furniture or equipment to avoid blocking the image.
For mixed-use rooms, consider a masking system that adjusts the visible screen area to match content. These add cost and complexity but eliminate black bars and maintain the cinematic feel across different aspect ratios. Installation requires additional mounting hardware and precise alignment.
Always check room lighting before finalizing screen choice. If blackout curtains or shades aren’t an option, invest in a gray or ALR screen. Testing from Good Housekeeping and similar outlets often evaluates how screens perform under various lighting conditions, helping narrow down the right material for a specific room.
Projector placement affects screen choice too. Ultra-short-throw (UST) projectors sit inches from the screen and often require specialized ALR screens to manage reflections. Standard throw projectors (1.5:1 to 2.0:1 throw ratio) offer more flexibility and work with most screen types.