
Building a dedicated home theater room transforms how a household experiences movies, sports, and gaming. It’s not just about a bigger screen, it’s about controlling acoustics, eliminating ambient light, and creating an immersive environment that commercial cinemas can’t match. Whether working with a finished basement, spare bedroom, or purpose-built addition, the right combination of equipment, room treatment, and layout design delivers professional-grade results. This guide walks through the technical decisions, spatial planning, and finish work needed to turn an empty room into a true theater experience.
Table of Contents
ToggleKey Takeaways
- A home theater room prioritizes physics-based environmental control—light blocking, acoustic optimization, and proper seating geometry—delivering better results than high-end equipment in compromised living spaces.
- Follow the 50/30/20 budget rule: 50% on equipment, 30% on acoustic treatment and construction, and 20% on seating and finishes; functional home theater rooms start at $5,000–$8,000.
- Soundproofing requires mass and decoupling (double-stud walls, resilient channels, Green Glue damping), while interior acoustic treatment focuses on first-reflection points and bass traps to control sound quality.
- Position seating 1.5 to 2.5 times the screen width away, use dedicated theater seating with proper lumbar support, and build risers with 12-inch rises for clear sightlines in multi-row configurations.
- Calibrate your A/V receiver using auto-calibration tools from multiple seating positions, and use measurement software like REW to identify and address frequency response issues that treatment or EQ can solve.
- Dark, matte wall finishes (charcoal, chocolate, navy) prevent light reflection back to the screen and enhance perceived contrast in home theater rooms.
What Is a Home Theater Room and Why Should You Build One?
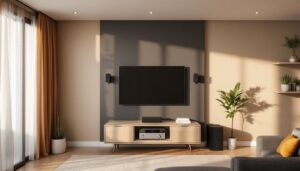
A home theater room is a dedicated space designed specifically for video and audio entertainment, distinct from a living room with a TV. The key difference lies in environmental control: light blocking, acoustic optimization, and seating arranged for optimal viewing angles.
Unlike a media room (which serves multiple functions), a true theater room prioritizes immersion. That means blackout capabilities, sound isolation from the rest of the house, and equipment calibrated for the room’s dimensions. It’s not about luxury, it’s about physics. A properly treated 12×16 room with mid-grade equipment will outperform a living room with high-end gear fighting against windows, hardwood floors, and traffic noise.
The value proposition extends beyond movie nights. Home theaters increase property appeal, particularly in markets where finished basements and bonus rooms are common. They also eliminate the variables that plague shared spaces: lighting compromise, sound bleed into bedrooms, and furniture that’s never quite positioned right. For households serious about audio-video quality, a dedicated room solves problems that no amount of soundbar upgrades can fix.
Planning Your Home Theater Room: Space, Budget, and Layout Considerations
Room selection matters more than equipment budget. Basements work well due to natural sound isolation and minimal windows. Spare bedrooms require more soundproofing but offer easier climate control. Bonus rooms above garages need floor reinforcement for tiered seating. Minimum functional size: 10×12 feet, though 12×16 or larger allows proper speaker placement and seating distance.
Ceiling height determines screen size and speaker mounting. 8-foot ceilings work for screens up to 100 inches diagonal: 9-10 feet accommodates larger displays and overhead Atmos speakers without crowding. Check joist direction if planning ceiling-mounted equipment, running cables perpendicular to joists requires more access points.
Budget allocation should follow the 50/30/20 rule: 50% on audio-video equipment, 30% on acoustic treatment and construction, 20% on seating and finishes. A functional theater starts around $5,000-$8,000 (modest projector, receiver, speaker package, basic treatment). Mid-tier builds run $15,000-$25,000. High-end installations exceed $50,000 but involve custom fabrication and professional calibration.
Layout follows the “golden ratio” for seating distance: viewers should sit 1.5 to 2.5 times the screen width away. For a 120-inch screen (roughly 10 feet wide), ideal seating is 15-25 feet back. Front row should never be closer than 1.2× screen width to avoid neck strain. Rear wall needs at least 3 feet clearance behind the last row for surround speaker placement and acoustic treatment.
Electrical planning requires dedicated 20-amp circuits for A/V equipment (separate from lighting) and consideration for future upgrades. Rough-in conduit during framing, pulling HDMI cables through finished walls later is miserable work. If the room shares walls with bedrooms, note that soundproofing involves structural work best done before drywall goes up.
Essential Equipment and Technology for Your Home Theater
Display choice splits between projectors and large-format TVs. Projectors deliver true cinema scale (100+ inches) at lower cost than equivalent flat panels, but require light control and ceiling mounting. Budget models (under $1,000) handle 1080p adequately: 4K HDR starts around $1,500. Screens matter, painted walls lose 20-30% brightness versus dedicated screens with optical coatings. Fixed-frame screens offer better tension than pull-downs.
Large TVs (75-85 inches) work in smaller rooms or spaces where ambient light control is difficult. OLED panels excel in dark rooms due to perfect blacks: LED/QLED handles brighter environments better. Mount height: center of screen at seated eye level, typically 42 inches off the floor.
Audio systems make or break the experience. Minimum configuration: 5.1 channels (left, center, right, two surrounds, one subwoofer). Dolby Atmos adds ceiling or height speakers for 5.1.2 or 7.1.4 setups. A/V receivers decode formats and power speakers, look for models supporting HDMI 2.1, eARC, and modern codecs (Dolby Atmos, DTS:X). Entry-level receivers start at $400: mid-tier ($800-$1,500) handle 7-9 channels with room correction.
Speaker placement follows strict geometry. Center channel goes directly above or below the screen. Front left/right flank the screen at 22-30 degrees from center seating. Surrounds mount 90-110 degrees to sides, 1-2 feet above ear level. Subwoofers perform best in corners or mid-wall positions, run a “subwoofer crawl” to find optimal placement for the room’s modes.
Many DIYers underestimate calibration. Receivers include auto-calibration microphones (Audyssey, YPAO, Dirac) that measure speaker distances, levels, and room response. Run calibration from multiple seating positions for best results. Manual adjustment often improves bass integration and dialogue clarity beyond auto-settings.
Media sources range from 4K Blu-ray players ($150-$400) to streaming devices. For best quality, wired network connections beat Wi-Fi, run Cat6 ethernet during construction. Ensure the receiver has sufficient HDMI inputs for all sources plus one spare.
Acoustic Treatment and Soundproofing Solutions
Acoustic treatment and soundproofing serve different purposes. Soundproofing prevents sound transmission in/out of the room. Acoustic treatment controls reflections, resonance, and frequency response inside the room. Both matter, but treatment affects sound quality more directly.
Soundproofing requires mass and decoupling. Standard drywall over studs fails miserably. Effective methods include double-stud walls (two 2×4 walls with 1-inch gap), resilient channel, and multiple drywall layers with Green Glue damping compound between sheets. Two layers of 5/8-inch drywall with Green Glue reduces transmission by 10-15 decibels versus single-layer.
Doors and windows leak sound. Solid-core doors with weatherstripping outperform hollow-core. Add threshold seals and consider double-door entries (soundlock) for serious isolation. Windows should be avoided entirely or covered with plug inserts, 3-inch rigid fiberglass wrapped in fabric, friction-fit into the frame.
Ceiling soundproofing matters if there’s living space above. Decouple ceiling joists with resilient clips and hat channel before hanging drywall. Fill joist bays with fiberglass batt insulation (R-19 minimum). This also improves the room’s internal acoustics by absorbing cavity resonance.
Inside the room, treat first reflection points: spots on side walls, ceiling, and floor where sound bounces directly from speakers to listeners. Use 2-4 inch thick acoustic panels (fiberglass or rockwool) at these locations. Most critical: side walls at ear level, and ceiling points between front speakers and seating.
Rear wall needs bass trapping and diffusion. Bass traps (thick panels or corner-mounted triangular units) absorb low frequencies that pile up in corners. Diffusers scatter reflections rather than absorbing them, maintaining spaciousness without harshness. DIY diffusers (skyline or quadratic) can be built from wood strips following online plans.
Hard, parallel surfaces cause flutter echo. Carpeting the floor is non-negotiable, wall-to-wall carpet with thick pad absorbs mid-high frequencies and footstep noise. Avoid hardwood, tile, or concrete.
Measurement tools help target problems. Free software like REW (Room EQ Wizard) with a USB measurement mic ($75-$100) reveals frequency response issues that treatment or EQ can address. Expect 4-8 panels minimum for small rooms: larger spaces need 12-16.
Lighting Design and Ambiance Control
Light control starts with eliminating external sources. Blackout window treatments are mandatory if windows exist, cellular shades, heavy curtains, or custom light-blocking panels. Even small light leaks degrade contrast, especially with projectors.
Internal lighting should never cause screen glare or require turning on during viewing. Dimmable LED sconces or step lights along side walls provide safe navigation without washing out the image. Position fixtures at or below seated eye level, aimed away from the screen. Many home automation systems integrate lighting control with A/V equipment for scene-based programming.
Bias lighting (LED strips behind the screen or TV) reduces eye strain in dark rooms by providing ambient glow. Use 6500K color temperature to match screen white point. Strip lights controlled by smart switches allow adjustment based on content brightness.
Ceiling cove lighting works well for pre-show ambiance but must turn off completely during playback. Wire on separate switches or dimmers so it’s never accidentally left on. Avoid recessed cans aimed at seating, direct downlighting creates distracting hotspots.
Control systems range from simple IR remotes to whole-home automation. Universal remotes ($50-$200) consolidate device control and simplify operation for household members. Higher-end options like Control4 or Savant ($1,500+) provide touchscreen interfaces and programmed “scenes” (one button dims lights, drops screen, powers on equipment). These require professional programming but deliver spouse-approval-factor.
Avoid RGB or color-changing lights during viewing. Save those for pre-show excitement if desired, but neutral tones (2700-3000K warm white) work best for general use without color contamination.
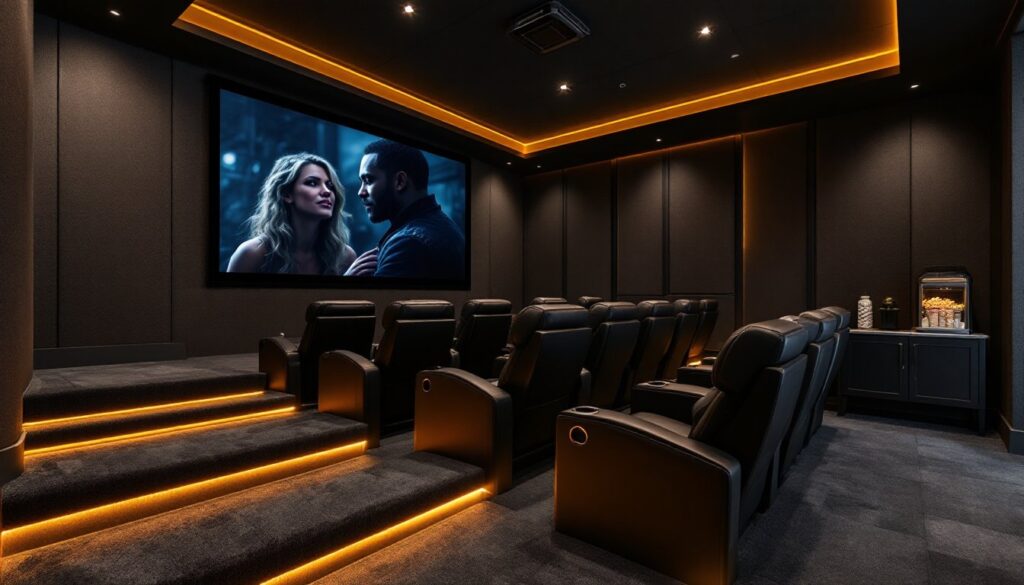
Seating, Décor, and Finishing Touches That Elevate the Experience
Theater seating beats standard furniture for long viewing sessions. Dedicated theater chairs include cup holders, reclining mechanisms, and proper lumbar support. Entry-level models start around $300-$500 per seat: premium options with power recline, heating, and cooling run $1,000-$2,000+. Measure seat width (typically 21-24 inches) and add 3-4 inches between chairs for arms and movement.
Riser platforms for second/third rows require structural consideration. 12-inch rise per row provides clear sightlines over front seating. Build from 2×6 or 2×8 joists (16 inches on-center) with 3/4-inch plywood decking. Carpet the risers and add edge lighting for safety. Verify floor joist capacity, tiered seating plus occupants adds significant point load. Most residential floors handle it fine, but if spanning long distances between supports, consult the IRC span tables or an engineer.
Wall color affects perceived contrast. Dark, matte paint (charcoal, chocolate brown, navy) prevents light reflection back to the screen. Avoid pure black, it makes the room feel like a cave. Semi-gloss or satin finishes bounce light: stick with flat or matte. Ceiling should match walls or go slightly darker.
Acoustic fabric panels double as décor when framed in wood trim. Print custom fabric (movie posters, abstract patterns) and wrap it over fiberglass panels for functional art. This beats bare brown absorption panels aesthetically.
Concession area (if space allows) adds authentic cinema feel. A small counter with mini-fridge, popcorn machine, and storage for snacks fits in a 4×6 footprint. Ensure electrical outlets and ventilation for heat-producing appliances.
Cable management separates amateur from polished installs. Run wiring in-wall during construction, or use paintable raceway channels after. Label both ends of every cable for future troubleshooting. Leave service loops (extra length coiled behind equipment) for future moves or upgrades.
HVAC considerations: projectors and receivers generate heat. Ensure adequate ventilation, ceiling return vents work well if quiet. Avoid supply vents aimed at the screen or projector lens. Some builders install dedicated mini-split systems for precise temperature control without noise.
Finally, creating thoughtful ambient design with elements like movie poster frames, LED rope lighting along baseboards, and quality carpeting transforms a functional space into an experience that rivals commercial theaters. The difference between a room with equipment and a true theater lies in these finishing details.
Conclusion
A well-executed home theater room delivers years of reliable entertainment without compromise. Success depends on treating it as a construction project first and an electronics installation second. Proper planning around acoustics, light control, and spatial layout ensures equipment performs to spec rather than fighting the room. Most failures stem from skipping soundproofing, underestimating acoustic treatment, or choosing the wrong space. When approached methodically, measuring twice, roughing in infrastructure during framing, and calibrating equipment properly, even modest budgets yield theater-quality results that justify the effort.